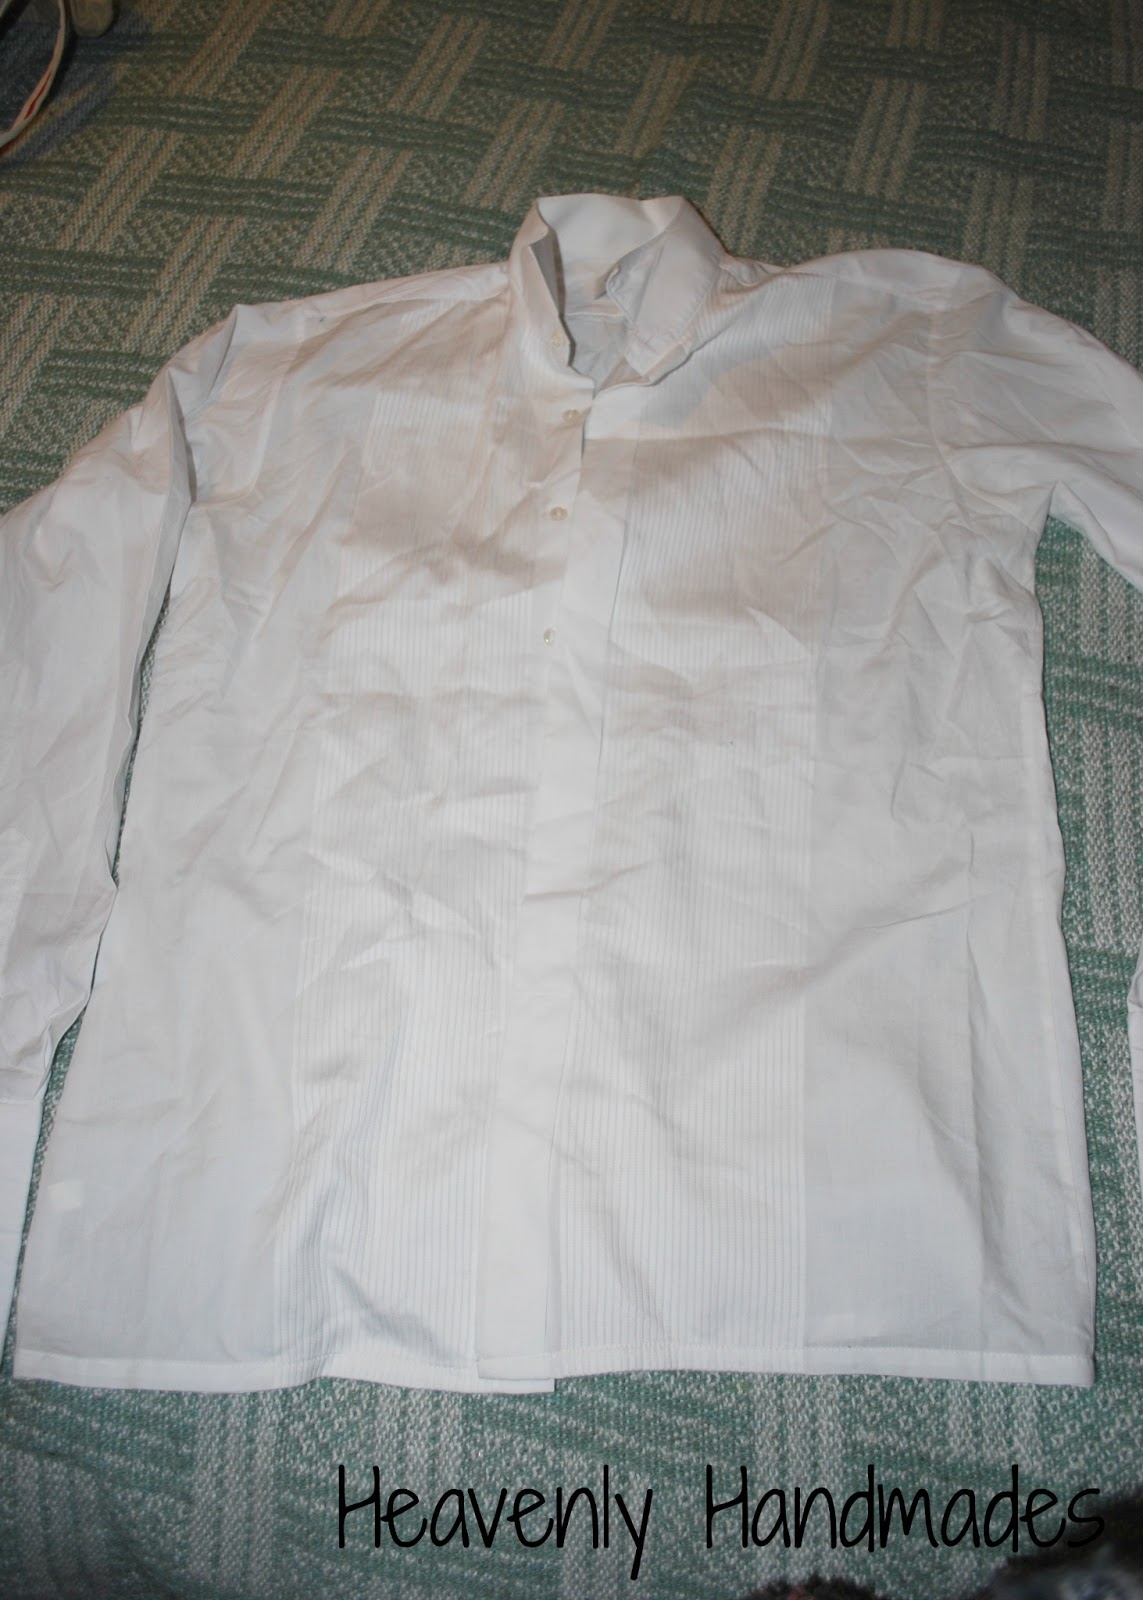
I have been hanging on to my husband's shirt he wore for our wedding for the last (almost) 10 years. It wasn't new when he wore it for our wedding (we were broke, my parents paid for the day and we didn't want to waste money on things that didn't need replacing) , in fact I think he may have worn it when we went to our school prom together... Anyway, after the wedding and another couple of formal outings its collar and cuffs were not longer presentable. He wanted to throw it out, I wouldn't let him, so it has sat in a suitcase under our bed since then....
Now I am drowning in a sea of fabric and old clothes and am desperately trying to deal with my stash so decided to have a go at refashioning it into a blouse for me.
I placed a blouse that fits me on top of the shirt and drew round it (not the sleeves though).
I then forgot to take pictures, but cut the shirt out, sewed up the new shoulder seams and put the blouse on my dress form and drew the new neckline. I then used another old shirt to make facings for the neck, sewed them on, then top stitched round the edge.
I put in bust darts and shaped the sides of the shirt.
I then cut the arms of the shirt roughly where they fitted then new size armholes. I attached the sleeves, gathering them slightly to fit, then cut the sleeves to the length I wanted. I finished them by putting two bands of fabric (that were just a wee bit bigger than my arm) round the bottom and gathered the bottom of the sleeve to fit.
Finally I have a blouse that fits!
 |
| Tucked. I cut my head of for your sake, it was a gruesome picture :~) |
 |
| Untucked. It is bad when the best photo is one of you trying to get something out of your eye... |
I made the skirt I am wearing in the pictures last November and used a vintage pattern. I had to increase the size of to accommodate my large waist, forgetting that it maybe wasn't the best time of the month to be taking measurements and making skirts... So, before Christmas, the skirt fitted for one week a month and now I have lost some weight it doesn't fit at all. I am going to have to eventually take it apart and re size it but until I have reached my target weight it will remain cranked in at the waist with a belt looking totally unflattering!!
Linking to some of
these fab linky parties!


You've done a great job, Alison. Love the gathered sleeves with the band at the bottom.
ReplyDeleteLove the new shirt. You have done an amazing job.
ReplyDeleteCarolx
Thanks! I was surprised how well it turned out, first time lucky maybe...!
DeleteAlison
x
Really love it Alison, I think it is perfect that you were able to give a new lease of life to your hubby's wedding shirt and it looks great too.
ReplyDeleteHave a great day, Estelle xx
What a lovely DIY idea - such a great end result too :)
ReplyDeleteThanks for linking up!
Sarah @ A Cat-Like Curiosity
Thanks! I think I will have to make more, I am loving having a blouse to wear!
DeleteAlison
x
wow, you are so clever! That does not seem like an easy thing to do but it looks great
ReplyDeleteThis is beautiful and such a great idea! I've never thought of saving the shirt my husband wore to our wedding. It's still in decent shape, but the day he goes to throw it out I'll have to steal it first! You've inspired me. :)
ReplyDeleteThanks for linking up to Refashion Friday!
Thanks! My aim is to try not to stain it now, me and white tops don't really go very well and I would be really sad if I had kept it for almost 10 years just to stain it!!
DeleteAlison
x
Hey Alison, you did a great job with your top. Oh, and just so you know... you can take a man's shirt collar off (just the upper actual collar... not the bottom of it) and flip it over then re-attach. Same with the cuffs... except of course you need to switch sleeves when you re-attach. This way you can get twice the wear. And the old worn area's don't show! :)
ReplyDeleteJean C.
Thanks for the tip, I would never have thought just to turn them over...!
DeleteA
x
I found it when I was looking for a different sort of information but I am very interested in the article, It is nice to read such kind of good posts I like your work keep it up!
ReplyDeleteCustom dress shirts online