Showing posts with label frozen. Show all posts

Saturday, 13 September 2014

DIY Elsa Dress


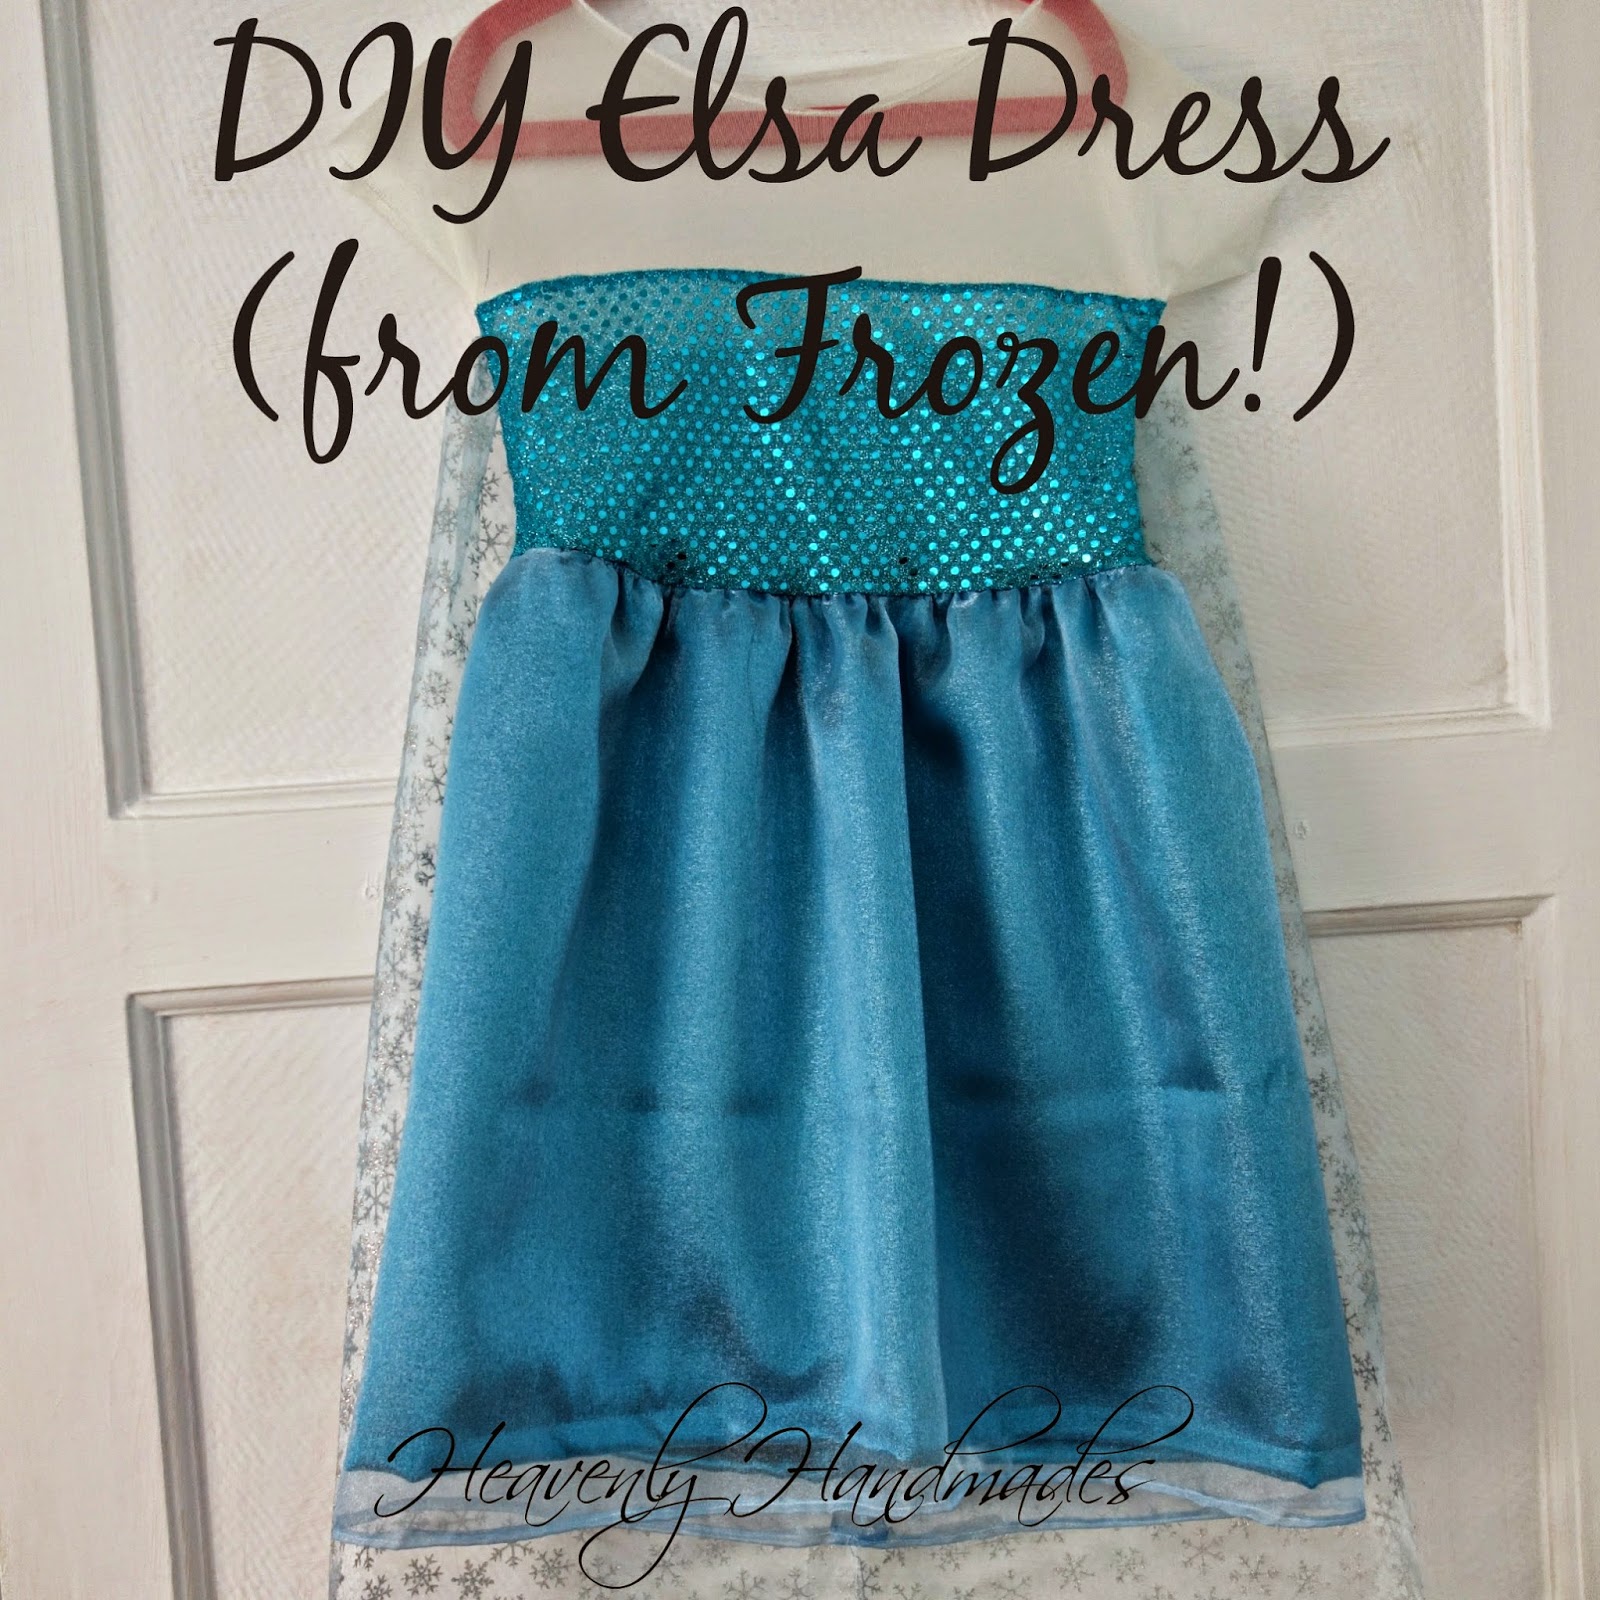
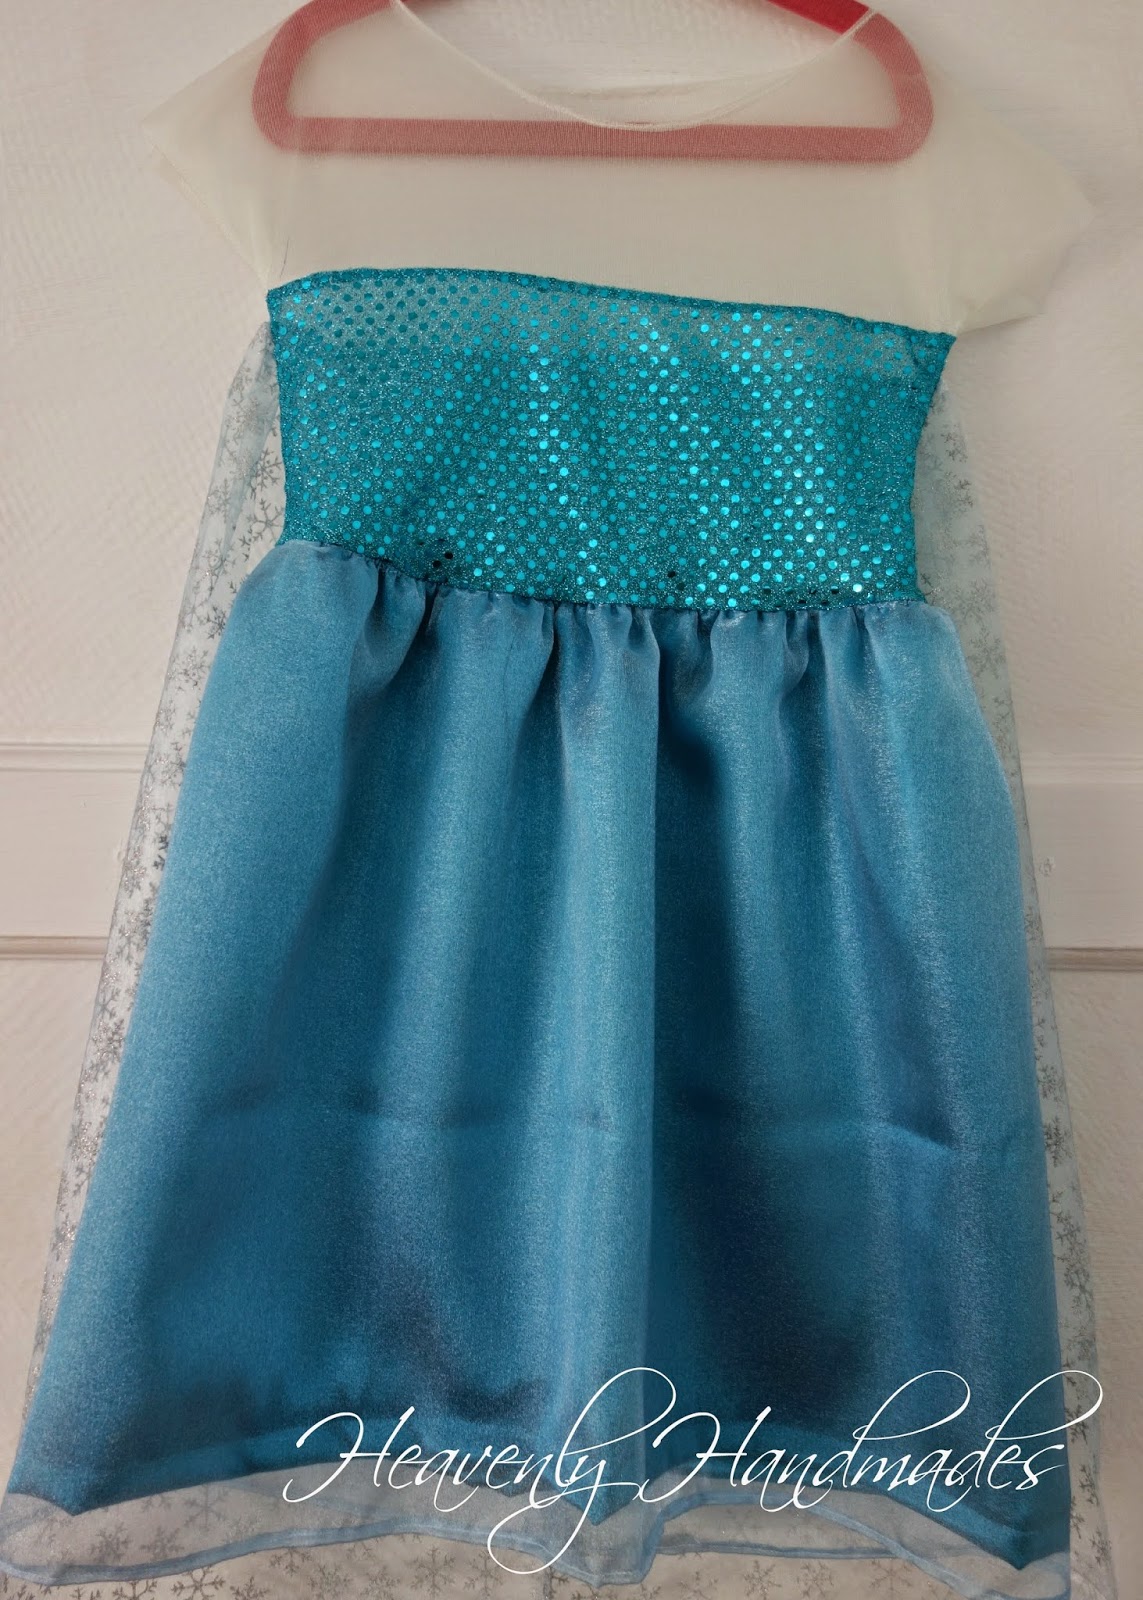
This is my second Elsa Dress, version one including a tutorial can be found here. I made this in July for little e's 6th birthday party at the start of August, it was a hit!

This time the spec was a proper Elsa dress... i.e. skirt with a split and sheer blue material on top!

All my fabrics are from ebay and go against all the ethical fabric buying rules I have set myself but you don't get organic fairtrade sparkly material so I suppose ethics have to take a back seat sometimes... The sheer blue is stretchy power mesh used in underwear, sequin stuff is also stretchy and the skirt is stretchy satin.


I used a kids t-shirt pattern and cut the mesh out as the pattern but shortened it to be to the waist.

I then cut the sequins using the sheer blue as a template and curved the top slightly. I forgot to make the waist a v shape - next time! Sequins were then sewn over the sheer and the snowflake organza added in the seam between the sequins and mesh on the back. The top was then made as you would any t-shirt and the neck was rolled on the overlocker.


I then measured the waist and used them measurement to free hand a maxi length skirt to attach to the bodice. I obviously can't measure because I messed up and made my skirt too small... I cut the skirt on the fold and just put the seam at the front and didn't sew all the way down. The edge of the slit is hemmed as usual.
 
It is not perfect but stood up to two days of constant wear, one of which was spend jumping on a bouncy castle!


Queen Elsa now wants an Anna costume for Christmas (and I secretly really really want to make myself Anna's coronation dress, if only I had a ball to go to!).


Linking to some of these parties!

Thursday, 14 August 2014

DIY Elsa from Frozen inspired head band


I love fabric flowers and have made lots of head bands with fabric flowers attached so I decided that was the way to go for the girls party bags at little e's frozen party. I hate waste, especially the toys you normally get to put in party bags that end up in landfill a week later, so, Elsa inspired head bands for the girls it was!


If you want to make head bands (alice bands) I got mine on ebay, but you could also put the corsages on to hair clips.

To make the corsage:


Fold organza circles into quarters then stick 4 on to a small felt circle with hot glue. then stick a felt snowflake in the middle and stick a rhinestone in the middle of the snowflake. The corsage is stuck to the head band with a small blob of hot glue as well.

They were very well received and worked out at less than £1 to make so cheap as well as useful!


Linking to some of these link parties!

Tuesday, 12 August 2014

Frozen Birthday Party


What a crazy week, I have been in party / back to school mode and I think I need a holiday to recover!

Little e was 6 on Friday, how 6 years have passed I have no idea but all of a sudden our little girl isn't so little any more :( She is Frozen daft so wanted a Frozen birthday party for her friends. We had it on Saturday and it was a simple affair - 14 children, 1 bouncy castle, 2 organised games (stick the nose on Olaf and frozen statues, no photos of these as all the kids are in them) and some food.

I had been madly pinning Frozen party ideas which was probably a mistake as my effort looks lame in comparison but here are some pics of the day:


These are 2 marshmallows, a chocolate stick broken in half, some raisins
and a bit of dried apricot cut into a triangle. They went in the party bags.

Frozen Hearts

Food - Melted Snow, Olaf noses, snowflake biscuits, snowballs, frozen hearts and fairy cakes.


Olaf on the beach cake
The cake was a night before job. Little e requested an Olaf on the beach cake so that is what she got! I used this how to to help getting the shape of Olaf's face correct, it worked not too badly. The sand is crushed digestives and I used a flower garland round the cake. If I had had time I would have piped the surf but just stuck on a sausage of fondant instead...!

Finally, here are the labels I made for the various food, if you click on them they will come up full size and then you can right click and save them so you can print and use them as well!


Use this on small bottles of water.
Put it into a word document and make the correct size for your bottles!

carrots!

white chocolate coated strawberries


I put this on the party bags

I made Elsa inspired hair bands for the party bags but I will do a separate post about that.

Now to recover from the party and get ready for back to school tomorrow!!


Linking to some of these linky parties.

Thursday, 10 April 2014

DIY Elsa from Frozen Dress


First, if you haven't seen Frozen, watch it, it is great, Sven is my favourite character..!

See the end of the post for more Elsa Dresses and a hairband!

I asked a friends daughter if she could dress up as anyone who would it be...her reply, "Elsa of course!" I knew what I was making for her 5th birthday!

http://www.disney.co.uk/movies/frozen/characters/elsa

I had to use a lot of creative license here as really this is a slinky dress for a lady with curves but I gave it a bash.

It started with a mass purchase of fabric from ebay:


Snowflake organza,


turquoise stretchy sequined fabric (1m), sheer ivory stretchy fabric (1m), pale blue crystal organza (2m) and turquoise stretch satin (2m). The whole lot set me back £24 and is enough to make 2 dresses, considering the dress from the Disney shop is £40 it was a bargain!

You will also need  about 30cm of decorative elastic and (waist size x 2 and a bit ) of narrow fairly light weight elastic.

I didn't have a suitable pattern so used an old t-shirt to make the pattern, here is the 'how to':


If your t-shirt has a collar cut it off then cut straight across just under the arms and cut it to the length of a correct size dress bodice ( I chopped about 3 inches off the bottom of this one). Get rid of the very bottom piece.


Cut the shoulder seams and up the centre of the sleeve and cut the remaining side seams.


Fold the pale stretch fabric so it is double layered. Pin the top and bottom section to the ivory (should be pale blue but I couldn't get any..). Here I used the back top piece as it needed a high neckline.


Here is where you have to wing it a little...

Cut round the t-shirt leaving a seam allowance all the way round. Extend the arms to full length.

(Aside: I ended up chopping the arms off, the final dress has short sleeves, because the fabric was only a one way stretch, check yours is 2/4 way before you go long sleeved...!)


Take only the lower portion of the t-shirt and cut out the sequin fabric (folded so you get 2), again leaving a seam allowance.


Take a bodice piece and pin the sequined piece to it, right sides together but with the sequins extending over the top of the bodice:


Stitch it in place and then flip it down:


Do this for the other bodice piece then place them right sides together and sew up the side and arm/shoulder seams, matching the sequined parts of the bodice.

It was this point I realised the stretch, or lack of it, issue and chopped the sleeves!


Next, take your Snowflake organza and cut it to length (under arms to floor on lucky recipient). My organza was narrow so it was just under twice the width of the bodice.

Take your decorative elastic and cut it to the width of the back bodice


You are now going to sew the organza on to the elastic while stretching the elastic so it is the same length as the organza is wide. You will have to hold front and back as it goes through the machine as it pulls on the needle otherwise.

Then take the organza on elastic and sew with a stretch stitch on to the bodice. I positioned it just under the seam line for stability.


Next you need to cut the fabric for the skirt. Lay the satin and pale organza on top of each other and cut them into a large rectangle, the width depends on how wide you want the skirt, mine was 46 inches, and the length entirely depends on the person it is for! I made mine calf length so that there is no tripping!

Join each piece of fabric individually so you will have 2 tubes. Place the satin inside the organza.

Take some narrow, fairly soft, elastic and sew it on to a loop that is waist sized.

Then, using the stretch and sew technique as before sew the 2 layers of skirt to the elastic (elastic on the inside).


 You will end up with this:
 

Trim any stray threads (if your fabric is like mine there will be millions!) then put the bodice inside the skirt, right sides together, and stitch them together. I used a stretch stitch and sewed in the elastic then overlocked the raw edges.


Lastly hem the skirts, neck and arm's. I used a rolled hem for the bodice and the normal fold 0.5cm then fold again 1cm hem on the skirts.

Turn the dress the right way out and give it a shake!


 The waistline will always be a little lumpy as there is elastic there but it is a dressing up costume, stretchy enough for kids to take on and off themselves and that is all that matters!


 Recruit a willing model  (bed head optional) -  little e is a lot taller that the little girl it was for so it is very short on her..


It must be ok, little e now wants one of her own and the little girl it was for declared that she loved it, phew!

Edited 30/12/14: I have made another two different Elsa dresses and a hairband, click on the pictures!


Linking to some of these fab linky parties.
 Threading My Way_Featured